Tuesday, January 28, 2014

It's Here!!!

Rev up those sewing machines!! It's here!  The all new Shelly Jack Handmade sewing pdf pattern!  The Peek A Boo Traveler Pattern with Bonus Bag Bling Bead Pattern!  You can pick yours up right here at Craftsy!  You can also get a copy over at my Shelly Jack Handmade etsy shop.  Go get one!  These travel bags are AMAZING!  I have several and they go with me EVERYWHERE!


Saturday, January 25, 2014

Ahoy Mate!

I'm back!  We took a short five day road trip to the North and East.  Fun!  Most people are trying to get out of winter, not us, we headed straight into it!  I'm sure I was the only happy one about the weather, hehe.  What can I say, I love snow!  We went from Kalamazoo, MI to Baltimore, MD to Washington DC to North Carolina and back to Nashville, TN.  Whew!  Now that's a road trip!  Here are a few shots of our cold journey.  Most of these are from my new favorite destination, Baltimore Maryland.  I must have lived in or near Little Italy and Fells Point in another lifetime because I felt right at home and fell in love immediately!  Have a look and check back later this week for updates on the launch of my two new pdf sewing patterns.  Back to work and the drawing board for me!  Cheers.


Ahh, snow!

So far not too bad…for the passenger lol.


Arrived to Baltimore safely….11 hours later :/ poor Dave!


The Wharf Rat in Fells Point.  Amazing!  Building circa 1700's.   Haunted of course!  We swear there is a mans face in the middle row of windows, second one from right!  See him?


Look at the pirate orb following Dave! 


 Huge fireplace


Cool bar and fantastic fish & chips!


A little wine before trekking around.


So Handsome!


 So COLD!!!


I thought this looked like a frozen octopus!


The streets are the original Belgian block.


Dave headed to warmer shelter!  


The USS Constellation.  The only remaining ship from the Civil War.


"Can we pleeeease go inside?"


Friday, January 17, 2014

Feeling A Little Blue?

Me too!  I've got so many projects and new ideas going on there's no time for sickness!  Been fighting off a flu cold bug all week :/  So, feeling a little blue got me thinking about the color blue, which in turn turned into this cute little blueness under 'proDUCKtion'.  Sorry, had to say it lol.  Blue is my little niece Vivs favorite color, or at least it was last week.   She will be getting the finished ducky in the mail as a surprise along with her 'pasghetti' she requested :)  Hope you are feeling well and your weekend is off to a fabulous start!


A few other 'blue' projects going on in my sewing space.


I'll post the finished blue projects soon!  Couldn't wait….here he is…. Blue Ducky =)


You can get the Abbey Glassenberg Rubber Duck pattern over here.  This is just too cute.   If you are not a sewer and would like one custom made, leave me a message over at my etsy shop and request a custom order.

Monday, January 13, 2014

Bag Pattern Review

Part of my 'new year' resolution is to clean up and clear out some of my stash.  Cleaning is the easy part, but 'clearing out', not so much!  So, while I was cleaning I came across my collection of bag and tote patterns and books.  I'm a huge Amy Butler fan and have made quite a few of her totes.  Love!   This time I decided to try out a different designer.  I bought this book "Bags The Modern Classics" by Sue Kim


some time ago and just never got around to making anything in it.  Well, I finished the "Metro Shopping Bag" today using Amy Butler fabric of course.  For the handles I used scrap leather pieces I had and I also added an extra hidden lining of canvas for durability.   It came together pretty easily and I would recommend it even for a beginner, a patient beginner.  I say that because there were a couple of things I found a bit confusing.  One being the actual pattern pieces in the back of the book.  It took some time to really look at the pieces to figure out which ones were the ones I needed.  There are two large sheets in the back with the patterns printed on it and you are suppose to find the pieces required and trace the pattern pieces onto another piece of paper.  After I figured out which ones were for the Metro Shopping Bag, I just folded up around the outlines and copied them on my printer.  It was much easier that way.  The other being what seam allowance to sew with.  Once I had everything all cut out and ready to begin sewing, I couldn't find the sewing seam allowance anywhere.  So, I just looked at the pictures and figured it must be 1/2" and made adjustments accordingly.  I think I was right as I had no problems after that at all.  Here's my finished bag.   It turned out really cute.  What do you think?  


Saturday, January 11, 2014

It's Here! Awesome Addictive Fun Reversible Tote Bag Tutorial

Here it is!  This is where it all started for me.   I made one of these and I was hooked!  The basic tote bag.  I've had this fabric in my stash for about three years now.  What?  I know.  Working on cleaning out my sewing space to make room for new.  This bag and tutorial are part of that process.  A warning to you, these are addictive!  There are "sew" many variations of this that you can make.  Cut the fabric pieces down about ten inches each and use ribbon for handles and you will have little Valentines Day gift gift bags.  Increase the fabric pieces by ten inches each, use some cotton webbing for handles and you have yourself an awesome beach tote!  I told you :)  Leave me a comment and let me know how you like love your new tote.  I would love to see it too, so leave a link to a pic of your beautiful new tote bag creation.  Enjoy!


Reversible Tote Bag Tutorial


What You Will Need

2 Pieces of fabric for the exterior measuring 15" x 16 1/2" 
2 Pieces of contrasting fabric for the interior measuring 15" x 16 1/2"
2 Pieces of coordinating fabric for the straps measuring 4" x 22" 

*These measurements are just suggestions.  Make the bag any size you like.  Use fabric that you already have lying around.  Also, for the straps, you could use cotton or polyester webbing.  The width of the handles is up to you, the length should still be around 22" for each handle.*


Assembly

Cut out your fabric pieces according to the measurements above.  You should have something like this:


Fold one of the strap pieces in half lengthwise and press.


Open up strap piece.  Fold bottom half up to center fold mark and press.  Repeat with top.


Fold strap piece in half and press.


Repeat with other strap piece.  Your straps should look like this now.


Stitch straps along each side.


Pin strap ends to top of exterior fabric pieces.  Fold each exterior piece in half and mark the top center with a pin.  Measure 4" from the center each way and pin the strap handles to the top like this:


Stitch straps in place.


Your pieces should look like this now.


Place pieces right sides together, leaving straps inside.  


Pin around sides and bottom leaving top open


Stitch around sides and bottom using 1/2" seam allowance.   Leave top open.


Place interior fabric pieces right sides together and sew around sides and bottom with 1/2" seam allowance.  Leave top open.


Make bag bottom pleats on exterior and interior bag pieces.  Pinch the bottom corner of bag together and measure 1/2" from the corner.  Pin, mark and stitch.


Trim off extra fabric/seam allowance on both bag corner pieces.


I like to go back and zig zag stitch around the corners, sides and bottoms.  This will help keep the fabric from fraying.  The bag is machine washable so you can keep it forever!  Yay :)


Turn bag interior right side out.  Leave bag exterior inside out.  Now it looks like this!  Getting closer :)


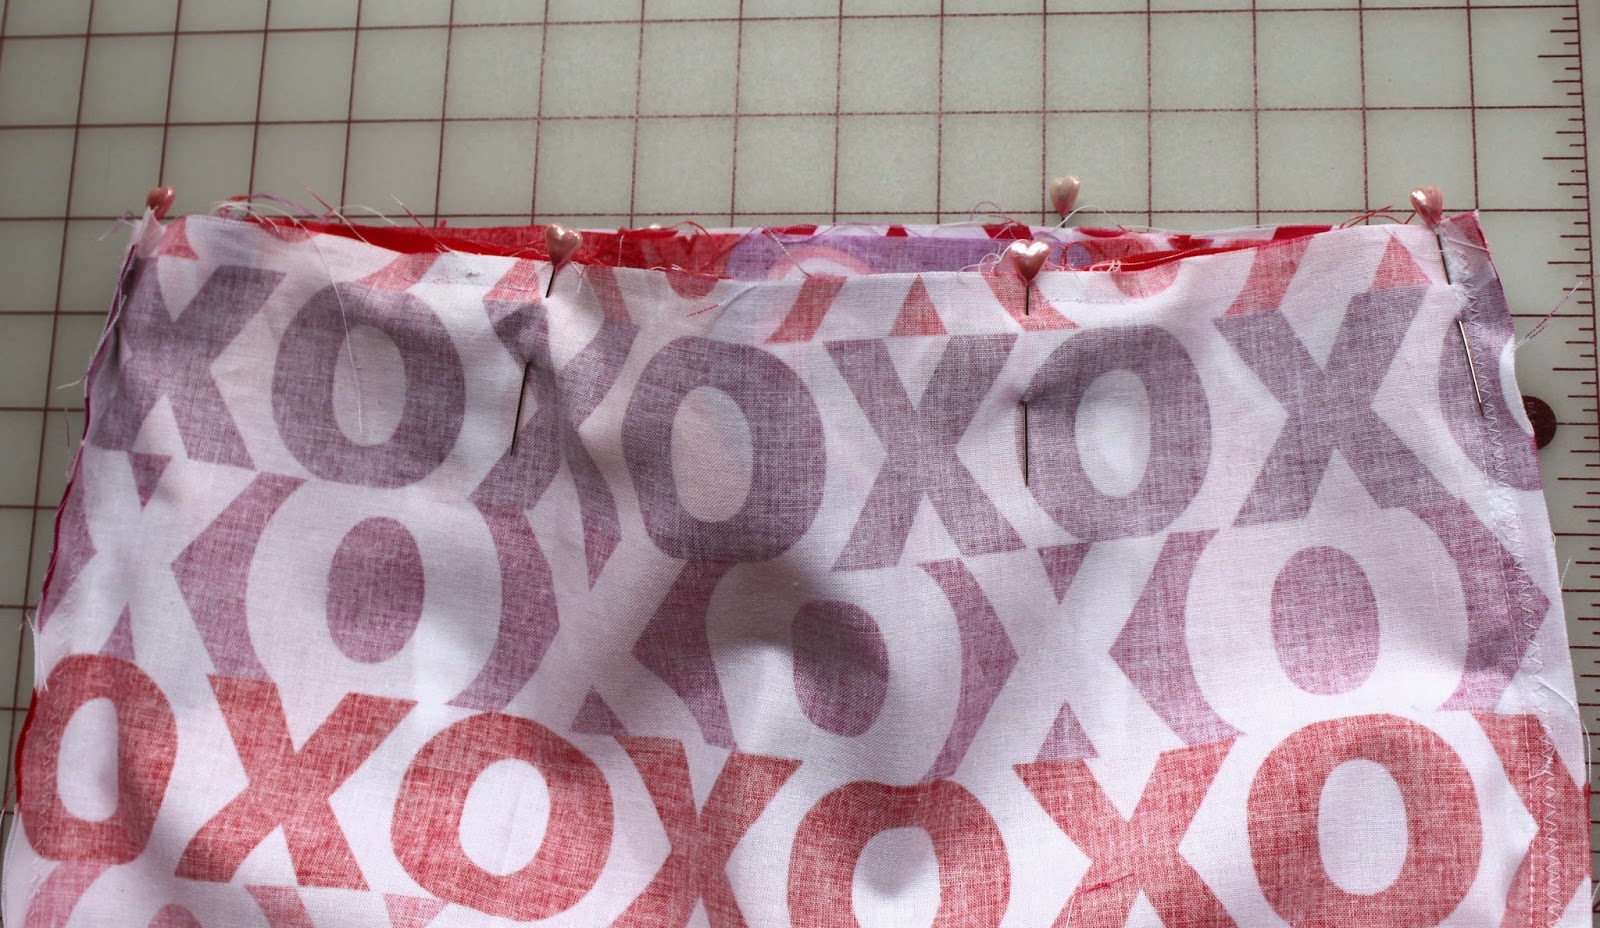
Insert bag interior to bag exterior.  Right sides together.  Line up seams and pin the top together leaving an opening between the handles on one side for turning.


(sorry for the blurry photo here)


Stitch around bag top with 1/2" seam allowance.  Remember to leave the opening between the handles on one side so you can turn the bag.


Turn the bag right side out through the opening. 


Press the top of the bag flat and stitch all the way around.  Go back and forth over the straps a few times if you like for extra strength.


TA DA!!!  You are finished!  Congratulations!  You are now the proud owner of your very own handmade custom tote bag!!  Yay :)


Now you can give the bag to your husband and ask him to fill it with wine and goodies from the market for you!!  =)